Herringbone tiles are one of the most stylish and versatile tile patterns for modern homes in 2025. Known for their iconic V-shaped zig-zag design, herringbone tiles add movement, depth, and elegance to any space. Whether used on kitchen floors, bathroom walls, or living areas, they instantly elevate the aesthetic while offering practical design benefits.
This guide explores everything you need to know about herringbone tile patterns: costs, benefits, popular layouts, materials, trending colours, and expert styling tips for modern interiors.
What Makes Herringbone Tiles So Popular?
Herringbone tiles have been used in architecture for centuries, from European palaces to contemporary urban lofts. Their enduring popularity lies in their ability to combine timeless elegance with modern style. The zig-zag pattern draws the eye along the tiles, making rooms feel larger, more dynamic, and visually interesting.
In 2025, herringbone patterns are trending for several reasons:
- They enhance small spaces by creating visual movement
- They work with a variety of materials and colours
- They add a high-end feel without overwhelming the room
- They suit kitchens, bathrooms, hallways, and feature walls
- They blend seamlessly with both traditional and contemporary interiors
Herringbone Tile Design Ideas
Herringbone tiles are incredibly versatile, allowing for creative interpretations in any home.
1. Kitchen Splashbacks
A herringbone splashback creates a bold focal point behind your cooktop or sink. Whether you choose glossy ceramic tiles for a sleek look or textured porcelain for warmth, the zig-zag pattern instantly elevates the kitchen.
Designer Tip: Pair light tiles with contrasting grout for a subtle pattern highlight, or choose a tone-on-tone approach for a minimalistic finish.
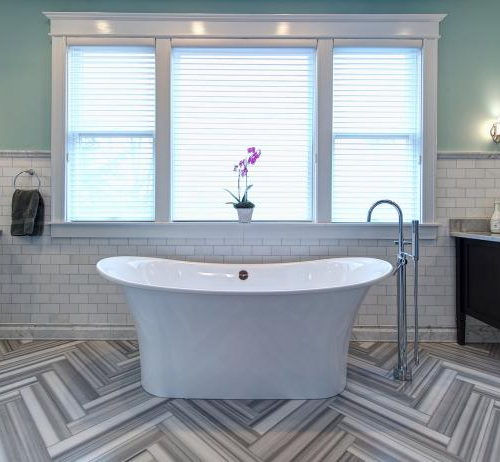
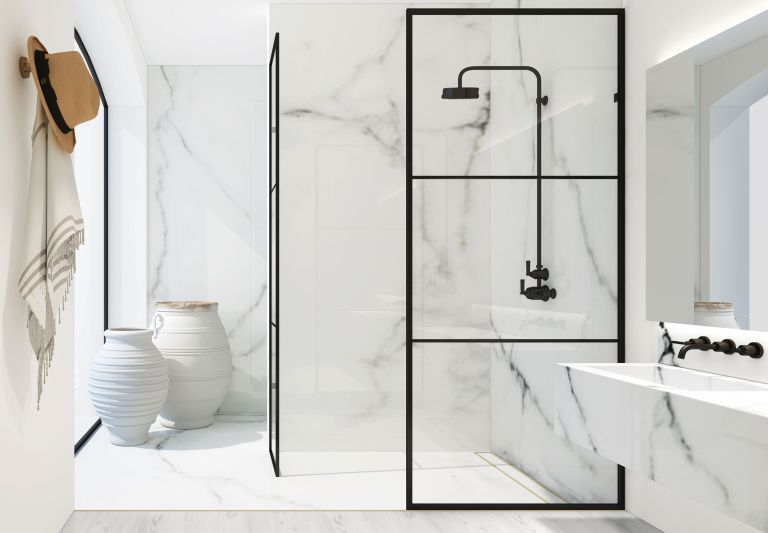
2. Bathroom Feature Walls
In bathrooms, herringbone tiles are perfect for shower walls, vanities, or behind a bathtub. Using larger-format tiles or neutral tones creates a spa-like atmosphere, while bolder colours add drama and personality.
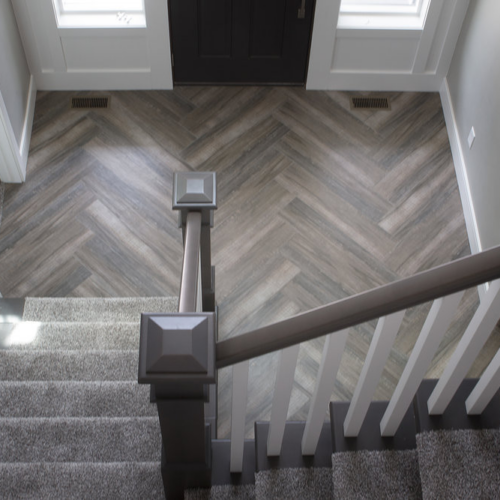
3. Floors in Living Areas and Hallways
Wood-look herringbone tiles on floors bring a luxurious, timeless feel to living rooms, hallways, and open-plan spaces. Porcelain versions offer durability and water resistance while mimicking the warmth of timber.
4. Fireplace Surrounds and Alcoves
A herringbone tile feature wall around a fireplace instantly becomes a room’s focal point. Marble, slate, or matte porcelain tiles enhance texture and sophistication, making your living space feel curated and high-end.
Popular Herringbone Layouts
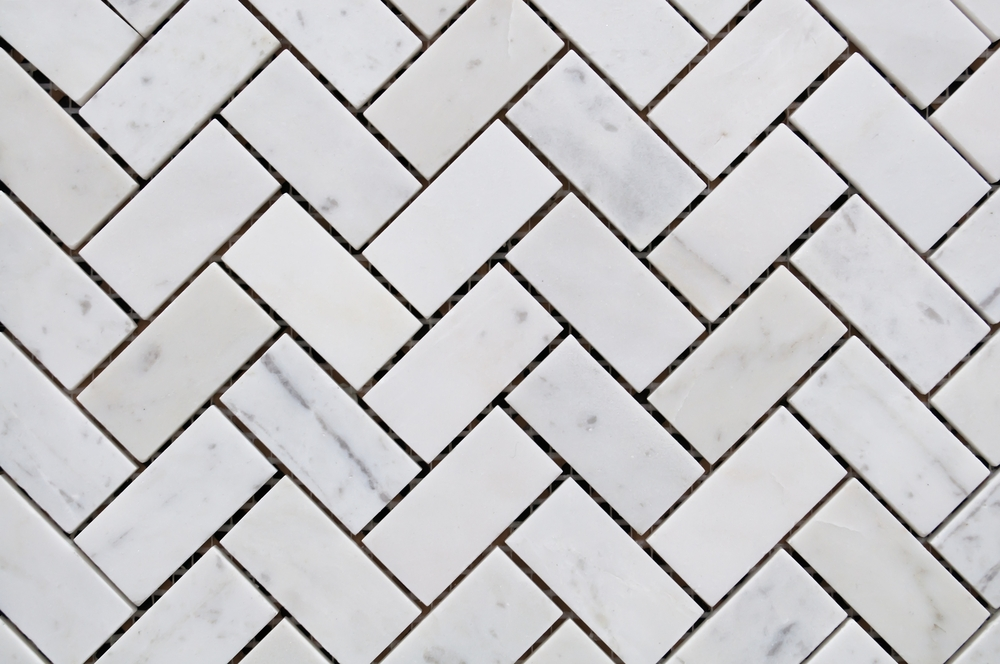
1. Classic 45-Degree Herringbone
The most iconic layout, tiles are laid diagonally at 45 degrees to create a striking zig-zag pattern. Ideal for splashbacks, feature walls, or floors, this layout offers the perfect balance of tradition and modernity.
2. Straight Herringbone (90-Degree)
This modern layout aligns tiles vertically or horizontally for a clean, structured look. Perfect for minimalist kitchens or contemporary bathroom floors.
3. Double Herringbone
Two tiles form each leg of the V, creating a bold, chunky pattern. Best used in open spaces, statement walls, or expansive floors for maximum visual impact.
4. Diagonal and Vertical Variations
- Vertical herringbone: adds height to rooms
- Horizontal herringbone: widens narrow spaces
- Diagonal: adds movement and softness to interiors
Materials for Herringbone Tiles
The material you choose affects both the look and function of your herringbone design.
1. Ceramic
- Affordable and versatile
- Ideal for walls and splashbacks
- Easy to clean and maintain
2. Porcelain
- Durable and water-resistant
- Perfect for floors, bathrooms, and kitchens
- Wide range of colours and finishes
3. Natural Stone
- Marble, travertine, and limestone create luxurious aesthetics
- Requires sealing and maintenance
- Ideal for high-end feature walls and floors
4. Wood-Look Tiles
- Porcelain tiles mimic timber flooring
- Moisture-resistant and durable
- Great for kitchens and bathrooms with a warm, natural look
5. Glass Tiles
- Reflective and bright
- Perfect for splashbacks and shower walls
- Adds modern sophistication
Trending Colours for Herringbone Tiles in 2025
- Soft neutrals: beige, cream, taupe, and light grey
- Earthy greens: sage, olive, eucalyptus tones
- Deep blues: navy, teal for dramatic statements
- Charcoal and black: sleek, industrial style
- Glossy white: timeless and bright, ideal for small spaces
- Textured and handmade finishes: add organic warmth and character
Costs of Herringbone Tile Installation
Herringbone tiles are generally more expensive to install than standard layouts due to precision and extra cuts required.
Factors affecting cost:
- Tile material (ceramic vs. marble)
- Tile size and format
- Complexity of layout and room size
- Professional labour fees
On average, homeowners can expect to pay 15–25% more for a herringbone installation than a standard straight lay due to increased labour time.
Tip: Investing in professional installation ensures a precise, high-quality finish that maximises the pattern’s visual impact.
Pros and Cons of Herringbone Tiles
Pros
✔ Adds visual interest and sophistication
✔ Enhances small spaces
✔ Works on walls, floors, and feature areas
✔ Complements both traditional and modern interiors
✔ Offers flexibility in materials, colours, and layouts
Cons
✖ Higher installation cost due to precision required
✖ Can appear busy if using bold colours in small rooms
✖ Requires careful measuring and cutting
✖ Natural stone tiles require sealing and maintenance
Modern Styling Tips for 2025
1. Use the Pattern Strategically
Herringbone tiles work best as feature walls, splashbacks, or flooring accents. Avoid overusing the pattern, which can overwhelm a room.
2. Play with Grout
- Light grout: subtle and seamless
- Dark grout: highlights the pattern
- Colour-matched grout: minimalist and cohesive
3. Mix Finishes
Combine matte and glossy tiles to add depth and texture. For example, matte floor tiles paired with glossy wall tiles create balance and visual interest.
4. Incorporate Lighting
LED strips, pendant lighting, or natural light enhances the herringbone pattern, highlighting its texture and angles.
5. Complement with Minimalist Fixtures
Keep cabinetry, sinks, and faucets simple so the tiles remain the focal point. Use neutral colours or metallic accents for a contemporary feel.